0. 基本介绍
本文是我作为机器学习小白的入门教程, 主要介绍 SageMaker 的基本使用, 以及一些最佳实践. 在本文中你可以了解到以下知识点:
- SageMaker 介绍
- 使用 CDK 搭建基础设施
- SageMaker Studio 的使用和测试
- 本地开发最佳实践
- 使用 sagemaker 训练出来一个线性回归的模型 demo
1. SageMaker 介绍
1.1 基本介绍
Amazon SageMaker 是一项完全托管的机器学习 (ML) 服务。借助 SageMaker,数据科学家和开发人员可以快速、自信地构建、训练机器学习模型,并将其部署到生产就绪的托管环境中。它为运行机器学习工作流程提供了用户界面体验,使 SageMaker 机器学习工具可在多个集成开发环境 (IDE) 中使用。
1.2 使用流程
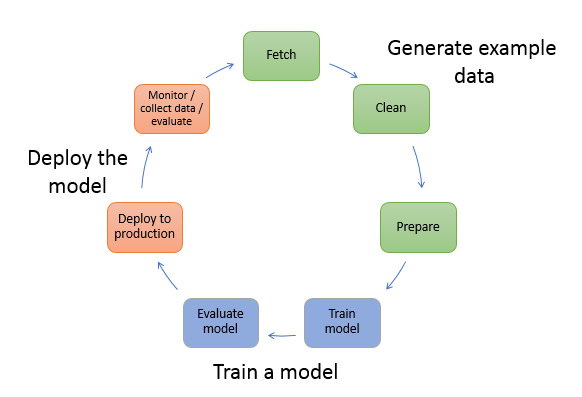
在机器学习中,你教计算机做出预测或推断。首先,您使用一种算法和示例数据来训练模型。然后,您将模型集成到应用程序中,以实时和大规模地生成推论
- 生成示例数据
- 获取数据
- 清理数据
- 准备或转化数据
- 训练模型
- 训练模型
- 评估模型
- 部署模型
1.3 设置
- **快速设置**:对于使用默认设置的个人用户来说,设置速度最快。
- **自定义设置**:适用于企业 Machine Learning (ML) 管理员的高级设置。机器学习管理员为多个用户或组织 SageMaker 进行设置的理想选择。
1.4 IaC
aws sagemaker 没有 L2 级别的 CDK 实现, 只能基于 L1 基本做一些自动化, 详情查看: aws_sagmaker 概要说明
2. 基础设施搭建
2.1 创建 SageMaker
1 | import { |
2.2 SageMaker Studio
脚本测试验证环境是否可以访问 s3:
上面例子中的bucket_name是新建的, 也可以选择已有的 Bucket, 但是需要将 Bucket 授权给域的执行角色有读写权限.
3 最佳实践
3.1 如何从现有的 DB/S3 中制造训练数据、存储?
对于已有的 Bucket, 可以在 CDK 中找到引用到 Bucket 并授 SageMaker 执行角色可以读写这个 Bucket 即可:
1 | const exitBucket = s3.Bucket.fromBucketName( |
实践总结: 从实际角度出发, 算法所用的数据可能有一定的格式, 所以一般的数据都要经过清洗和转化在使用比较好, 所以建议还是将已有的 Bucket 中的清洗转化后另存到专门数据分析的用的 Bucket 中然后进行读取.
3.2 jupyter notebook 模型代码 repo 如何管理?
在 SageMaker 中有对 Git 的支持, 通过测试本质上是在 SageMaker 实例上进行克隆代码, 但是经过测试无法从 github 获取代码, 失败信息如下:
1 | sagemaker-user@studio$ git clone https://github.com/nnsay/sagemaker-tutorial.git |
进而选择在本地进行代码管理和调试, 本地调试方式可以参考视频: Train with Amazon SageMaker on your local machine
视频教程中使用 conda 进行虚拟环境的搭建, 我这里使用 python 自带的虚拟环境, 具体步骤如下:
1 | # 创建虚拟环境 |
启动后可以在本地浏览器中打开, 地址可以在终端运行jupyter notebook的输出找到, 效果如下:
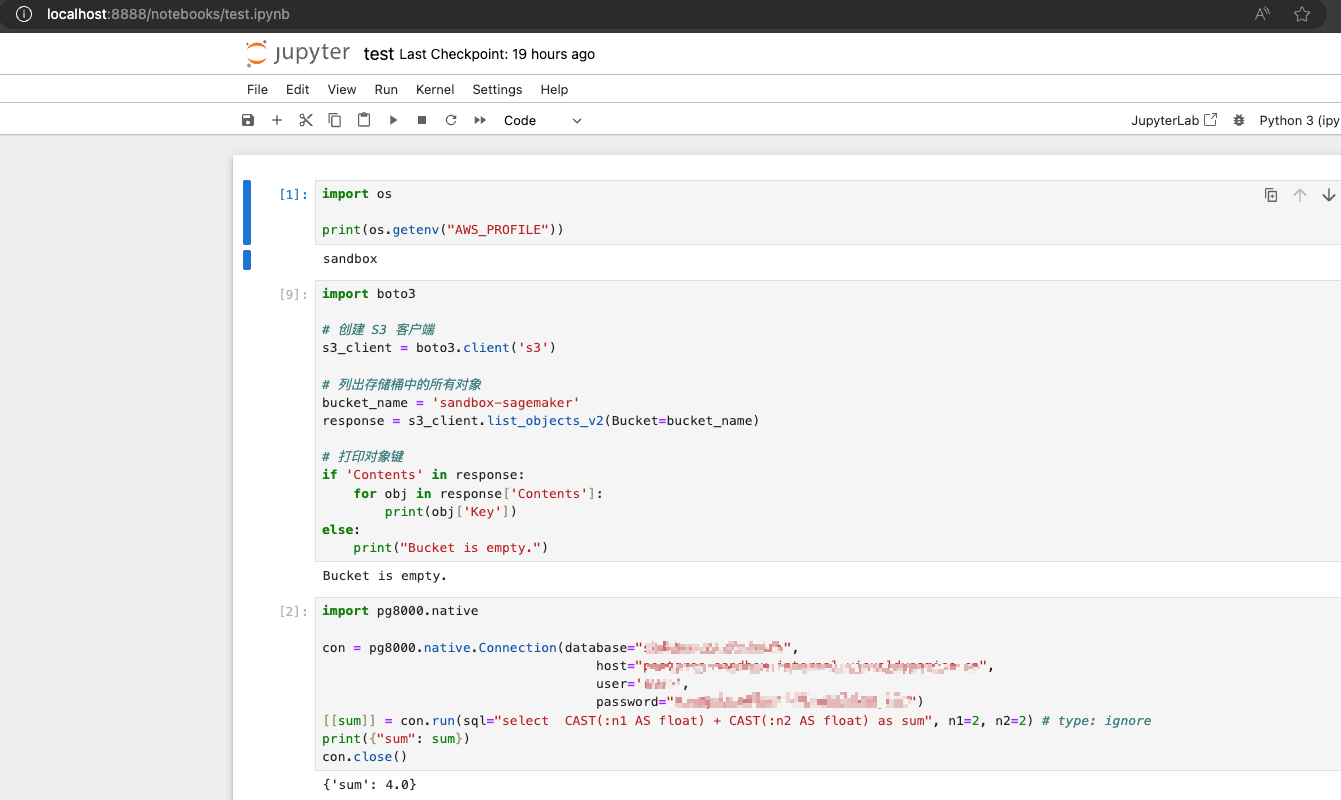
Note
本地 jupyter 不是很好用, 没有智能感知, 且操作不便, 只是本地开发的一种方式
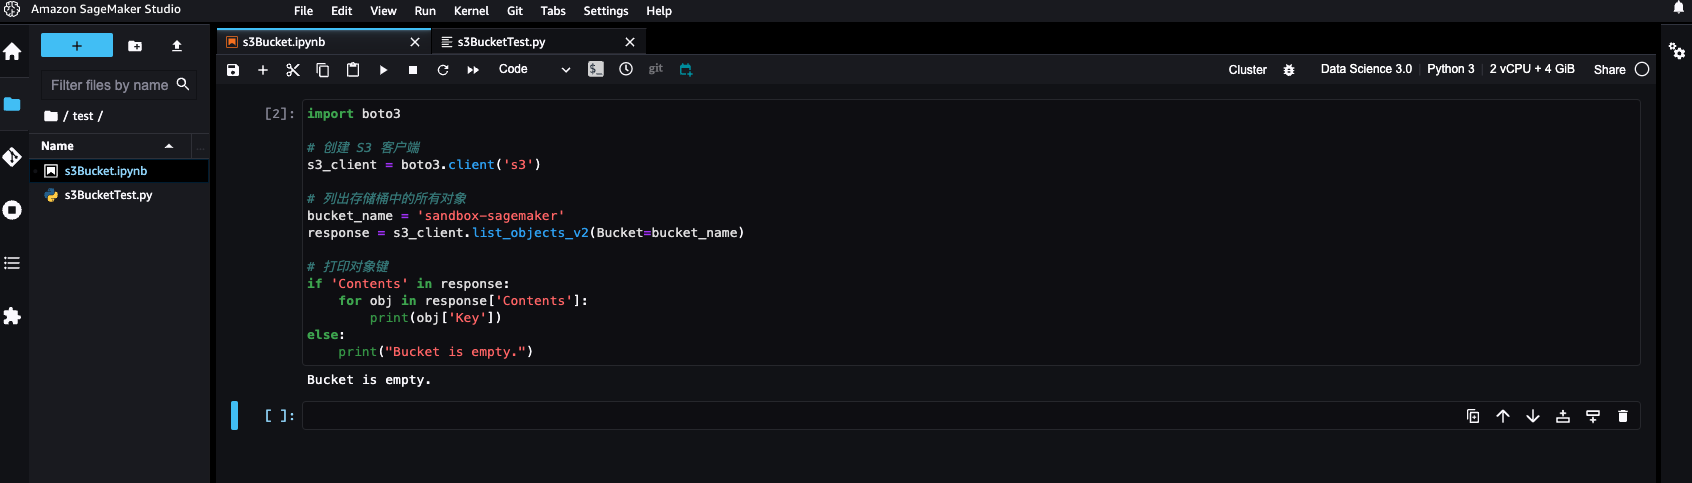
接下来探索如何在 vscode 安装 jupyter 插件后进行本地开发, 使用 vscode+jupyter 后不用再浏览器中写脚本了, 直接在 vscode 中写即可, 这里给出一个脚本的例子, 创建 test.ipynb 文件并添加以下几个代码单元:
运行时参数
1
2
3
4# 运行时参数
import os
os.environ["AWS_PROFILE"] = "sandbox"测试 s3 访问
1
2
3
4
5
6
7
8
9
10
11
12
13
14
15
16# 测试s3访问
import boto3
# 创建 S3 客户端
s3_client = boto3.client('s3')
# 列出存储桶中的所有对象
bucket_name = 'sandbox-sagemaker'
response = s3_client.list_objects_v2(Bucket=bucket_name)
# 打印对象键
if 'Contents' in response:
for obj in response['Contents']:
print(obj['Key'])
else:
print("Bucket is empty.")测试数据库访问
1
2
3
4
5
6
7
8
9
10# 测试数据库访问
import pg8000.native
con = pg8000.native.Connection(database="sandboxdb",
host="postgres-sandbox.internal.nnsay.cn",
user='root',
password="xxx)
[[sum]] = con.run(sql="select CAST(:n1 AS float) + CAST(:n2 AS float) as sum", n1=2, n2=2) # type: ignore
print({"sum": sum})
con.close()生成数据
1
2
3
4
5
6
7
8
9
10
11
12
13
14
15
16
17
18
19# 生成数据
import pandas as pd
import numpy as np
# 生成随机数据
np.random.seed(0)
data_size = 1000
X1 = np.random.rand(data_size)
X2 = np.random.rand(data_size)
y = X1 + X2 + np.random.rand(data_size) * 0.1 # 简单的线性关系,加上一些噪声
# 创建DataFrame
df = pd.DataFrame({"X1": X1, "X2": X2, "y": y})
# 保存为CSV文件到本地
df.to_csv("demo_data.csv", index=False)
# 保存为CSV文件到s3
# s3_client.put_object(Bucket=bucket_name, Key='demo_data.csv', Body=df.to_csv(index=False))训练脚本: train.py
1
2
3
4
5
6
7
8
9
10
11
12
13
14
15
16
17
18
19
20
21
22
23
24
25
26
27
28
29
30
31
32
33
34
35
36
37
38
39
40
41
42
43
44
45
46
47
48
49
50
51
52
53
54
55
56
57
58
59
60
61
62
63
64
65
66
67
68
69
70
71
72
73
74
75import argparse
import os
import pandas as pd
import boto3
from sklearn.model_selection import train_test_split
from sklearn.linear_model import LinearRegression
from sklearn.metrics import mean_squared_error
def parse_args():
parser = argparse.ArgumentParser()
parser.add_argument("--epochs", type=int, default=10)
parser.add_argument("--batch-size", type=int, default=32)
parser.add_argument("--learning-rate", type=float, default=0.01)
parser.add_argument("--model-dir", type=str, default=os.getenv("SM_MODEL_DIR"))
parser.add_argument("--data-dir", type=str, default="./")
parser.add_argument("--output-model-dir", type=str)
return parser.parse_args()
def main():
args = parse_args()
try:
# 打印参数以供调试
print(f"Arguments: {args}")
# 加载数据
data_path = os.path.join(args.data_dir, "demo_data.csv")
print(f"Loading data from {data_path}")
if not os.path.exists(data_path):
raise FileNotFoundError(f"Data file not found at {data_path}")
df = pd.read_csv(data_path)
print("Data loaded successfully")
# 分割数据集
X = df[["X1", "X2"]]
y = df["y"]
X_train, X_test, y_train, y_test = train_test_split(
X, y, test_size=0.2, random_state=0
)
print("Data split into training and testing sets")
# 训练简单的线性回归模型
model = LinearRegression()
model.fit(X_train, y_train)
print("Model trained successfully")
# 预测和评估
y_pred = model.predict(X_test)
mse = mean_squared_error(y_test, y_pred)
print(f"Mean Squared Error: {mse}")
# 保存模型
model_path = os.path.join(args.model_dir, "model.pkl")
print(f"Saving model to {model_path}")
pd.to_pickle(model, model_path)
print("Model saved successfully")
# 上传模型和结果到S3
s3 = boto3.client("s3", region_name="cn-northwest-1")
bucket = args.output_model_dir.split("/")[2]
s3_model_path = "/".join(args.output_model_dir.split("/")[3:]) + "/model.pkl"
print(f"Uploading model to S3 at s3://{bucket}/{s3_model_path}")
s3.upload_file(model_path, bucket, s3_model_path)
print(f"Model uploaded to S3 at s3://{bucket}/{s3_model_path}")
except Exception as e:
print(f"Error during training: {e}")
raise
if __name__ == "__main__":
main()提交训练作业
1
2
3
4
5
6
7
8
9
10
11
12
13
14
15
16
17
18
19
20
21
22
23
24
25
26
27
28
29
30
31
32
33
34
35
36
37
38
39
40import sagemaker
from sagemaker.sklearn import SKLearn
# 配置 SageMaker 角色和 S3 路径
role = "arn:aws-cn:iam::1212121212:role/sandbox-SageMakerExecutorRole"
bucket = 'sandbox-sagemaker'
prefix = 'demo'
# 创建 SageMaker 会话
sagemaker_session = sagemaker.Session()
# 上传训练数据到S3
input_data = sagemaker_session.upload_data('demo_data.csv', bucket=bucket, key_prefix=f'{prefix}/data')
# 创建并配置 SKLearn Estimator
sklearn_estimator = SKLearn(
entry_point='train.py',
role=role,
instance_count=1,
instance_type='ml.m5.large',
framework_version='0.23-1',
py_version='py3',
source_dir='.', # 指定源代码目录,以便包括 requirements.txt
dependencies=['requirements.txt'],
# output_path=f's3://{bucket}/{prefix}/output',
sagemaker_session=sagemaker_session,
hyperparameters={
'output-model-dir': f's3://{bucket}/{prefix}/output/model' # SageMaker 的输出路径
}
)
# 启动训练任务
sklearn_estimator.fit({'train': input_data})
# 下载训练结果
sagemaker_session.download_data(
path='./output',
bucket=bucket,
key_prefix=f'{prefix}/output'
)
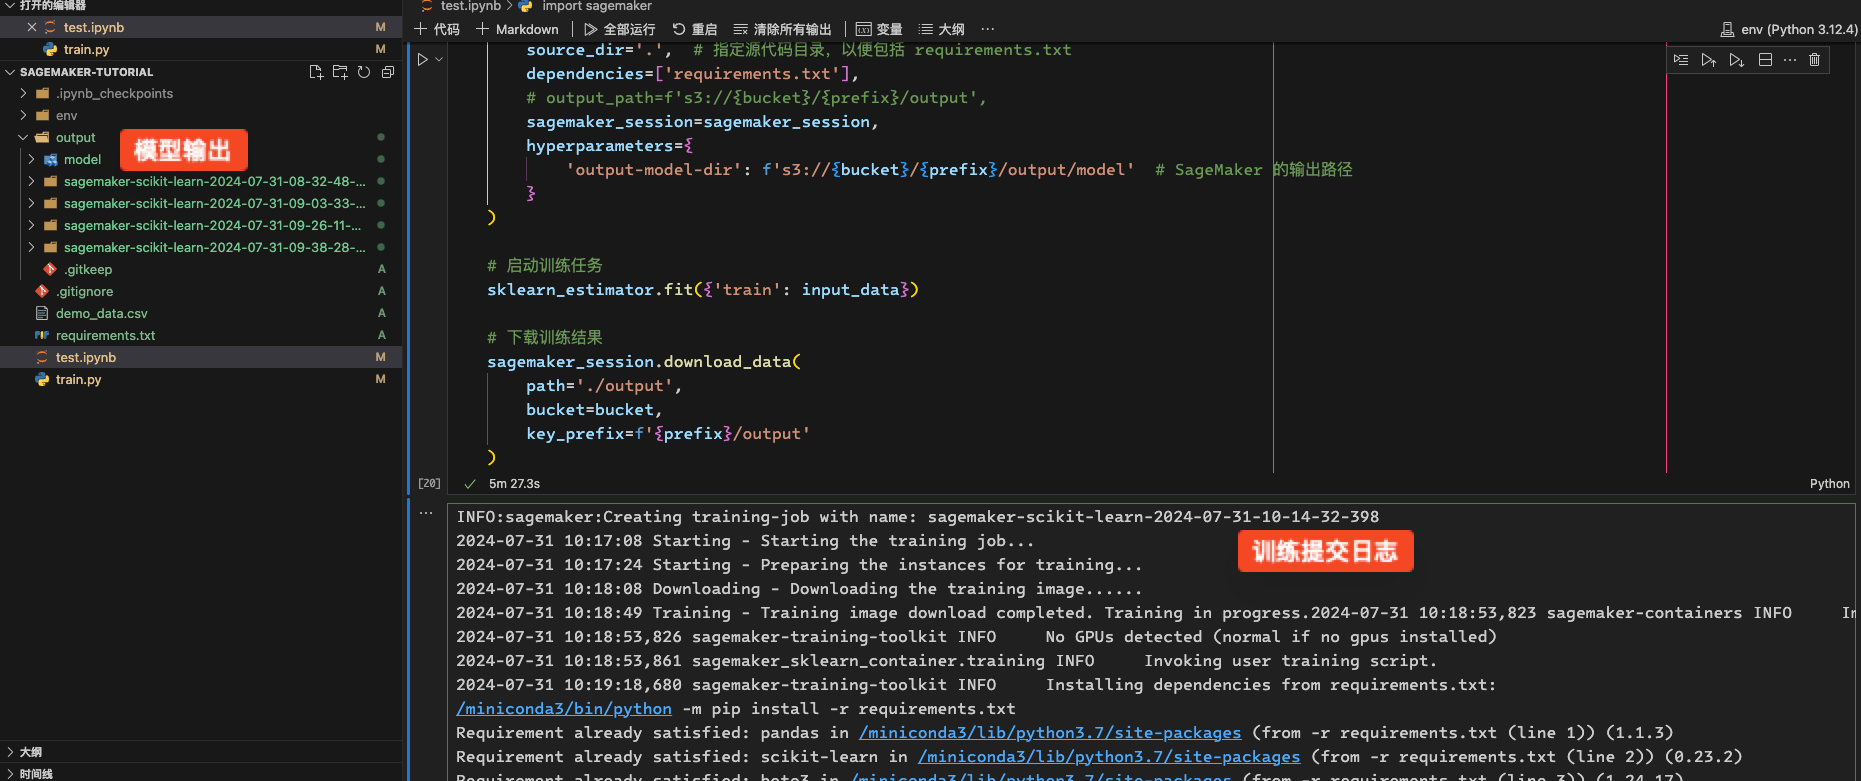
以上几个单元其中前几个是为了测试 s3/database 是否连通, 为取数据作准; 最后三个是一个演示训练, 先生成数据然后提交训练任务到 SageMaker.
jupyter 输出
1
2
3
4
5
6
7
8
9
10
11
12
13
14
15
16
17
18
19
20
21
22
23
24
25
26
27
28
29
30
31
32
33
34
35
36
37
38
39
40
41
42
43
44
45
46
47
48
49
50
51
52
53
54
55
56
57
58INFO:sagemaker:Creating training-job with name: sagemaker-scikit-learn-2024-07-31-10-14-32-398
2024-07-31 10:17:08 Starting - Starting the training job...
2024-07-31 10:17:24 Starting - Preparing the instances for training...
2024-07-31 10:18:08 Downloading - Downloading the training image......
2024-07-31 10:18:49 Training - Training image download completed. Training in progress.2024-07-31 10:18:53,823 sagemaker-containers INFO Imported framework sagemaker_sklearn_container.training
2024-07-31 10:18:53,826 sagemaker-training-toolkit INFO No GPUs detected (normal if no gpus installed)
2024-07-31 10:18:53,861 sagemaker_sklearn_container.training INFO Invoking user training script.
2024-07-31 10:19:18,680 sagemaker-training-toolkit INFO Installing dependencies from requirements.txt:
/miniconda3/bin/python -m pip install -r requirements.txt
Requirement already satisfied: pandas in /miniconda3/lib/python3.7/site-packages (from -r requirements.txt (line 1)) (1.1.3)
Requirement already satisfied: scikit-learn in /miniconda3/lib/python3.7/site-packages (from -r requirements.txt (line 2)) (0.23.2)
Requirement already satisfied: boto3 in /miniconda3/lib/python3.7/site-packages (from -r requirements.txt (line 3)) (1.24.17)
Requirement already satisfied: pytz>=2017.2 in /miniconda3/lib/python3.7/site-packages (from pandas->-r requirements.txt (line 1)) (2022.7.1)
Requirement already satisfied: numpy>=1.15.4 in /miniconda3/lib/python3.7/site-packages (from pandas->-r requirements.txt (line 1)) (1.19.2)
Requirement already satisfied: python-dateutil>=2.7.3 in /miniconda3/lib/python3.7/site-packages (from pandas->-r requirements.txt (line 1)) (2.8.1)
Requirement already satisfied: joblib>=0.11 in /miniconda3/lib/python3.7/site-packages (from scikit-learn->-r requirements.txt (line 2)) (1.2.0)
Requirement already satisfied: threadpoolctl>=2.0.0 in /miniconda3/lib/python3.7/site-packages (from scikit-learn->-r requirements.txt (line 2)) (3.1.0)
Requirement already satisfied: scipy>=0.19.1 in /miniconda3/lib/python3.7/site-packages (from scikit-learn->-r requirements.txt (line 2)) (1.5.3)
Requirement already satisfied: s3transfer<0.7.0,>=0.6.0 in /miniconda3/lib/python3.7/site-packages (from boto3->-r requirements.txt (line 3)) (0.6.0)
Requirement already satisfied: jmespath<2.0.0,>=0.7.1 in /miniconda3/lib/python3.7/site-packages (from boto3->-r requirements.txt (line 3)) (1.0.1)
Requirement already satisfied: botocore<1.28.0,>=1.27.17 in /miniconda3/lib/python3.7/site-packages (from boto3->-r requirements.txt (line 3)) (1.27.18)
Requirement already satisfied: urllib3<1.27,>=1.25.4 in /miniconda3/lib/python3.7/site-packages (from botocore<1.28.0,>=1.27.17->boto3->-r requirements.txt (line 3)) (1.26.14)
Requirement already satisfied: six>=1.5 in /miniconda3/lib/python3.7/site-packages (from python-dateutil>=2.7.3->pandas->-r requirements.txt (line 1)) (1.15.0)
WARNING: Running pip as the 'root' user can result in broken permissions and conflicting behaviour with the system package manager. It is recommended to use a virtual environment instead: https://pip.pypa.io/warnings/venv
[notice] A new release of pip is available: 23.0 -> 24.0
[notice] To update, run: pip install --upgrade pip
...
2024-07-31 10:19:37 Uploading - Uploading generated training model
2024-07-31 10:19:37 Completed - Training job completed
Training seconds: 114
Billable seconds: 114
Output is truncated. View as a scrollable element or open in a text editor. Adjust cell output settings...
['./output/model/model.pkl',
'./output/sagemaker-scikit-learn-2024-07-31-08-32-48-616/debug-output/training_job_end.ts',
'./output/sagemaker-scikit-learn-2024-07-31-08-32-48-616/profiler-output/framework/training_job_end.ts',
'./output/sagemaker-scikit-learn-2024-07-31-08-32-48-616/profiler-output/system/incremental/2024073108/1722414960.algo-1.json',
'./output/sagemaker-scikit-learn-2024-07-31-08-32-48-616/profiler-output/system/incremental/2024073108/1722415020.algo-1.json',
'./output/sagemaker-scikit-learn-2024-07-31-08-32-48-616/profiler-output/system/incremental/2024073108/1722415080.algo-1.json',
'./output/sagemaker-scikit-learn-2024-07-31-08-32-48-616/profiler-output/system/training_job_end.ts',
'./output/sagemaker-scikit-learn-2024-07-31-09-03-33-277/debug-output/training_job_end.ts',
'./output/sagemaker-scikit-learn-2024-07-31-09-03-33-277/profiler-output/framework/training_job_end.ts',
'./output/sagemaker-scikit-learn-2024-07-31-09-03-33-277/profiler-output/system/incremental/2024073109/1722416760.algo-1.json',
'./output/sagemaker-scikit-learn-2024-07-31-09-03-33-277/profiler-output/system/incremental/2024073109/1722416820.algo-1.json',
'./output/sagemaker-scikit-learn-2024-07-31-09-03-33-277/profiler-output/system/incremental/2024073109/1722416880.algo-1.json',
'./output/sagemaker-scikit-learn-2024-07-31-09-03-33-277/profiler-output/system/training_job_end.ts',
'./output/sagemaker-scikit-learn-2024-07-31-09-26-11-587/debug-output/training_job_end.ts',
'./output/sagemaker-scikit-learn-2024-07-31-09-26-11-587/output/model.tar.gz',
'./output/sagemaker-scikit-learn-2024-07-31-09-26-11-587/profiler-output/framework/training_job_end.ts',
'./output/sagemaker-scikit-learn-2024-07-31-09-26-11-587/profiler-output/system/incremental/2024073109/1722418140.algo-1.json',
'./output/sagemaker-scikit-learn-2024-07-31-09-26-11-587/profiler-output/system/incremental/2024073109/1722418200.algo-1.json',
'./output/sagemaker-scikit-learn-2024-07-31-09-26-11-587/profiler-output/system/incremental/2024073109/1722418260.algo-1.json',
'./output/sagemaker-scikit-learn-2024-07-31-09-26-11-587/profiler-output/system/training_job_end.ts',
'./output/sagemaker-scikit-learn-2024-07-31-09-38-28-790/debug-output/training_job_end.ts',
'./output/sagemaker-scikit-learn-2024-07-31-09-38-28-790/profiler-output/framework/training_job_end.ts',
'./output/sagemaker-scikit-learn-2024-07-31-09-38-28-790/profiler-output/system/incremental/2024073109/1722418860.algo-1.json',
'./output/sagemaker-scikit-learn-2024-07-31-09-38-28-790/profiler-output/system/incremental/2024073109/1722418920.algo-1.json',
'./output/sagemaker-scikit-learn-2024-07-31-09-38-28-790/profiler-output/system/incremental/2024073109/1722418980.algo-1.json',
'./output/sagemaker-scikit-learn-2024-07-31-09-38-28-790/profiler-output/system/training_job_end.ts']sage maker 训练任务
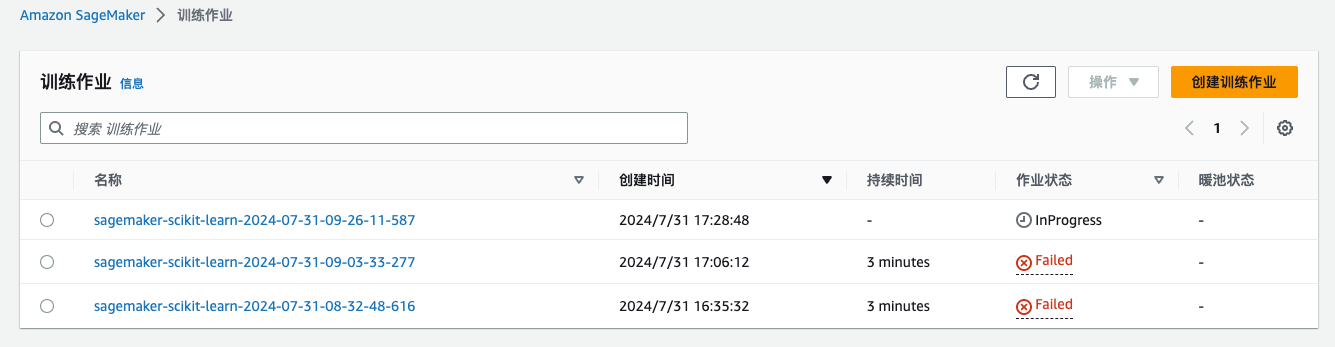
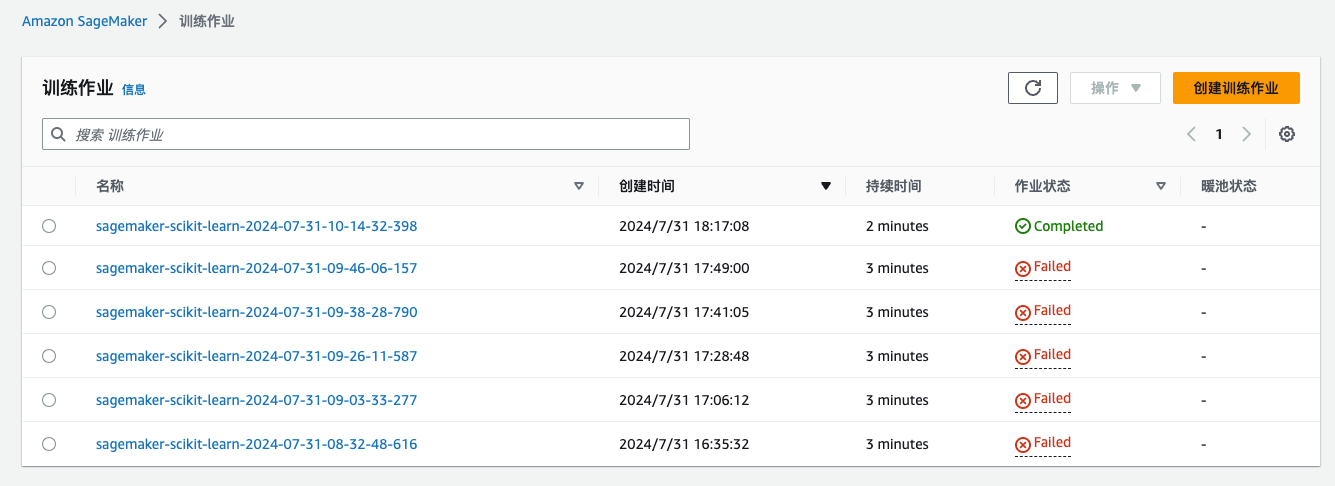
Note
训练作业在 aws 中并不能删除, 经过询问这些记录不会删除任何费用
实践总结:
- 虽然 aws 教学视频使用 jupyter notebook 在浏览器中进行编辑, 但是体验效果不如 vscode+jupyter 插件, 推荐使用 vscdoe
- jupyter 脚本可以通过 git 进行管理
- 模型的版本可以通过在模型保存路径或者具有特殊名称的模型文件名称来做版本控制