0. 业务背景介绍
- Nestjs: 一个 nodejs 后端开发框架, 类似与 express 和 koa, 但是特点是: 面向 OOP 编程方式
- Sentry: 一个基于事件的应用程序监控服务, 通过在应用程序中使用其 sdk 可以无侵入性的捕获程序异常和错误的问题, 然后发送到 sentry SAAS, 开发者可以通过 SAAS 平台对问题进行分析/分配/解决.
本文重点介绍针对已经有的 Nestjs 应用程序如何添加和配置 Sentry, 达到服务监控的目的. 在实践之前需要提前做的准备有:
- 一个 nestjs 应用程序
- 至少有一个路由可以出发一个自定义异常
- 注册完成 sentry
- 创建一个
node-express的项目 - 获取 dsn 信息
- 创建一个
1. 配置 Sentry
1.1 安装依赖
1 | yarn add @sentry/node |
1.2 集成 Sentry
1 | Sentry.init({ |
在 nest 中SentryInterceptor设计如下:
1 | import { |
1.3 webpack 配置
1 | /* eslint-disable @typescript-eslint/no-var-requires */ |
1.4 打包
1 | ➜ npm run build |
2. 执行和验证
flowchart TD
R(运行程序)-.->T(触发错误)
T(触发错误)-.->C(检查错误)
T(触发错误)-.->L(日志行号)
2.1 触发错误日志
1 | # 运行程序,触发错误,观察日志 |
注意: NODE_OPTIONS=–enable-source-maps 这是可以获取源代码行号的关键
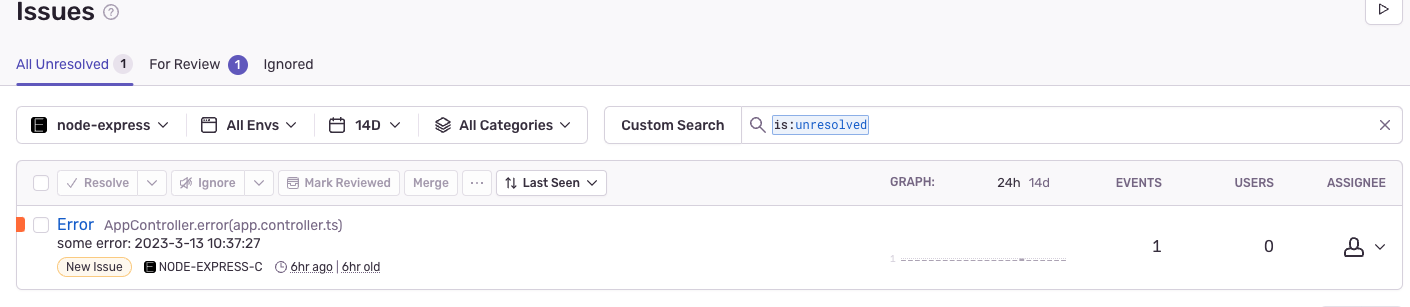
2.2 Sentry Issue 列表
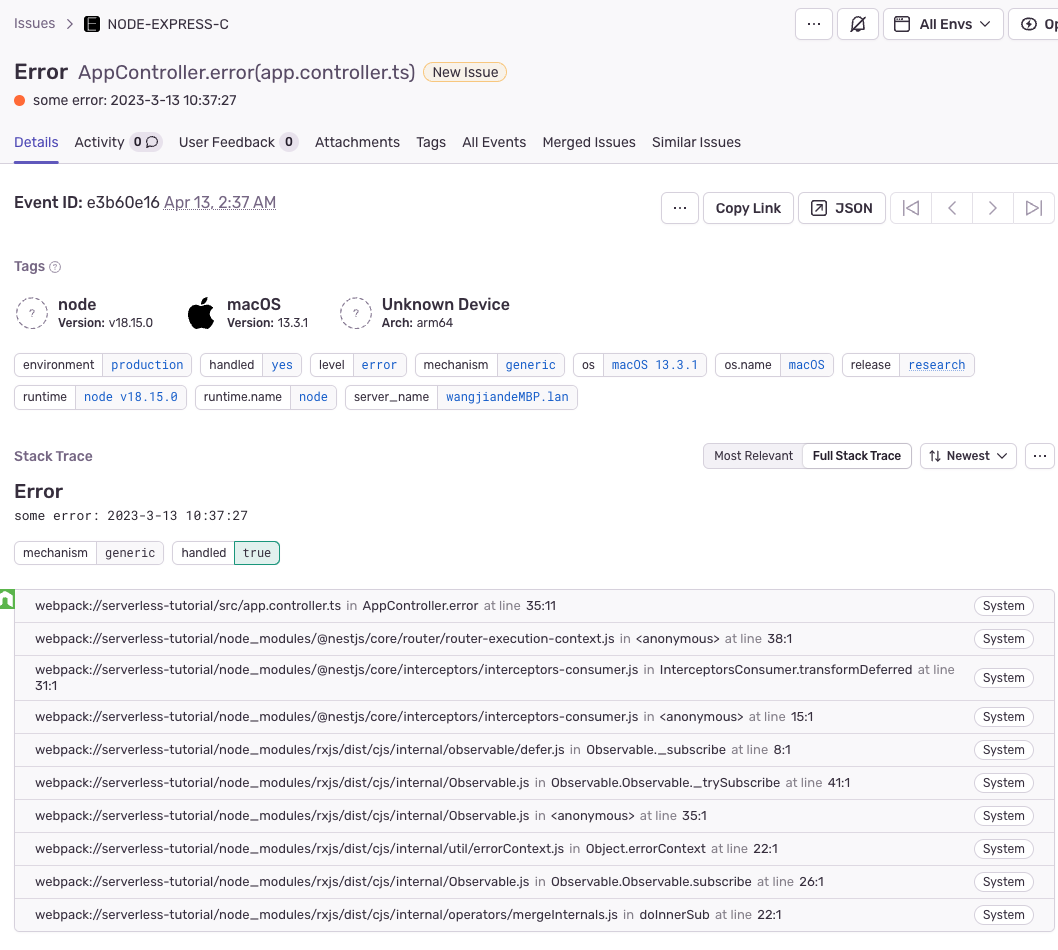
2.3 Sentry Issue 详情
2.4 其他测试结果
| 测试项 | SourceMap 工作? | Sentry 工作? | 注意 |
|---|---|---|---|
| 本地 nest api service | y | y | 使用@sentry/node |
| 本地 aws lambda | y | y | 使用@sentry/serverless |
| aws lambda | no | y | 使用@sentry/serverless lambda 使用 serverless 框架创建 |
aws lambda source map 问题见 Troubleshooting
3. Troubleshooting
aws lambda 为什么 SourceMap 不工作?
这可能与 aws lambda nodejs 运行时有关, 可以从这个 issue获取信息 解决方案: 使用source-map-support包, 具体做法如下:
安装包
1
yarn add source-map-support
修改入口文件, 增加如下代码在顶部
1
2
3
4
# nodejs
require('source-map-support').install();
# es6 or typescript
import 'source-map-support/register'
另外使用
source-map-support可以不用NODE_OPTIONS
4. 其他
性能取舍
添加 source map 后肯定会影响性能, 但是这种方式给开发者了快速定位了问题. 在测试 lambda 的过程中发现 sentry 的 sdk 会生成一个跳转到 cloudwatch 的日志, 所以可以做一个平衡: 监控报警使用 sentry, 而具体问题排查使用日志.